Onboarding via Clanbeat
What should I consider when creating my onboarding process?
The purpose of onboarding
Every time a new member joins your team, the need to welcome and properly equip the new colleague for mutual success arises. The process to help the new employee transition into their role and grow accustomed to the culture is known as onboarding or transitioning in some parts of the world. The onboarding process, while unique in each work environment, can be considered a key component for a long-lasting journey of growth and engagement.
About the onboarding feature
Clanbeat enables to create smooth and organised onboarding experiences and also keep track of the onboarding progress. Since needs and resources differ in every organization, the onboarding feature offers enough flexibility to design the checklist items and due dates as you see best. You can easily share your onboarding flow with your new team member.The onboarding process is led in 2 phases: 1) by creating a list of helpful tasks (task flow) which the new employee should complete; 2) by sending the list to the new employee. Once done, you can track how the colleague is doing.
Preparation: strategy and timeline
Before you go to create an onboarding flow on Clanbeat, it is important to think through the onboarding process in terms of your focus and time. What elements need to be added and over which period should they be displayed? Bear in mind that everything the new employee experiences with you from the first days onwards will set the tone for the future.
Ideally, onboarding should start as early as possible and cover 3 dimensions: 1) technical onboarding – the employee needs to get access to the relevant tools and systems to carry out their everyday work tasks; 2) professional onboarding – the employee needs to acquire the knowledge and skills related to the role and duties to be successful in their work position; 3) social onboarding – the employee needs to feel that they fit in on a social and cultural level to contribute and become engaged.
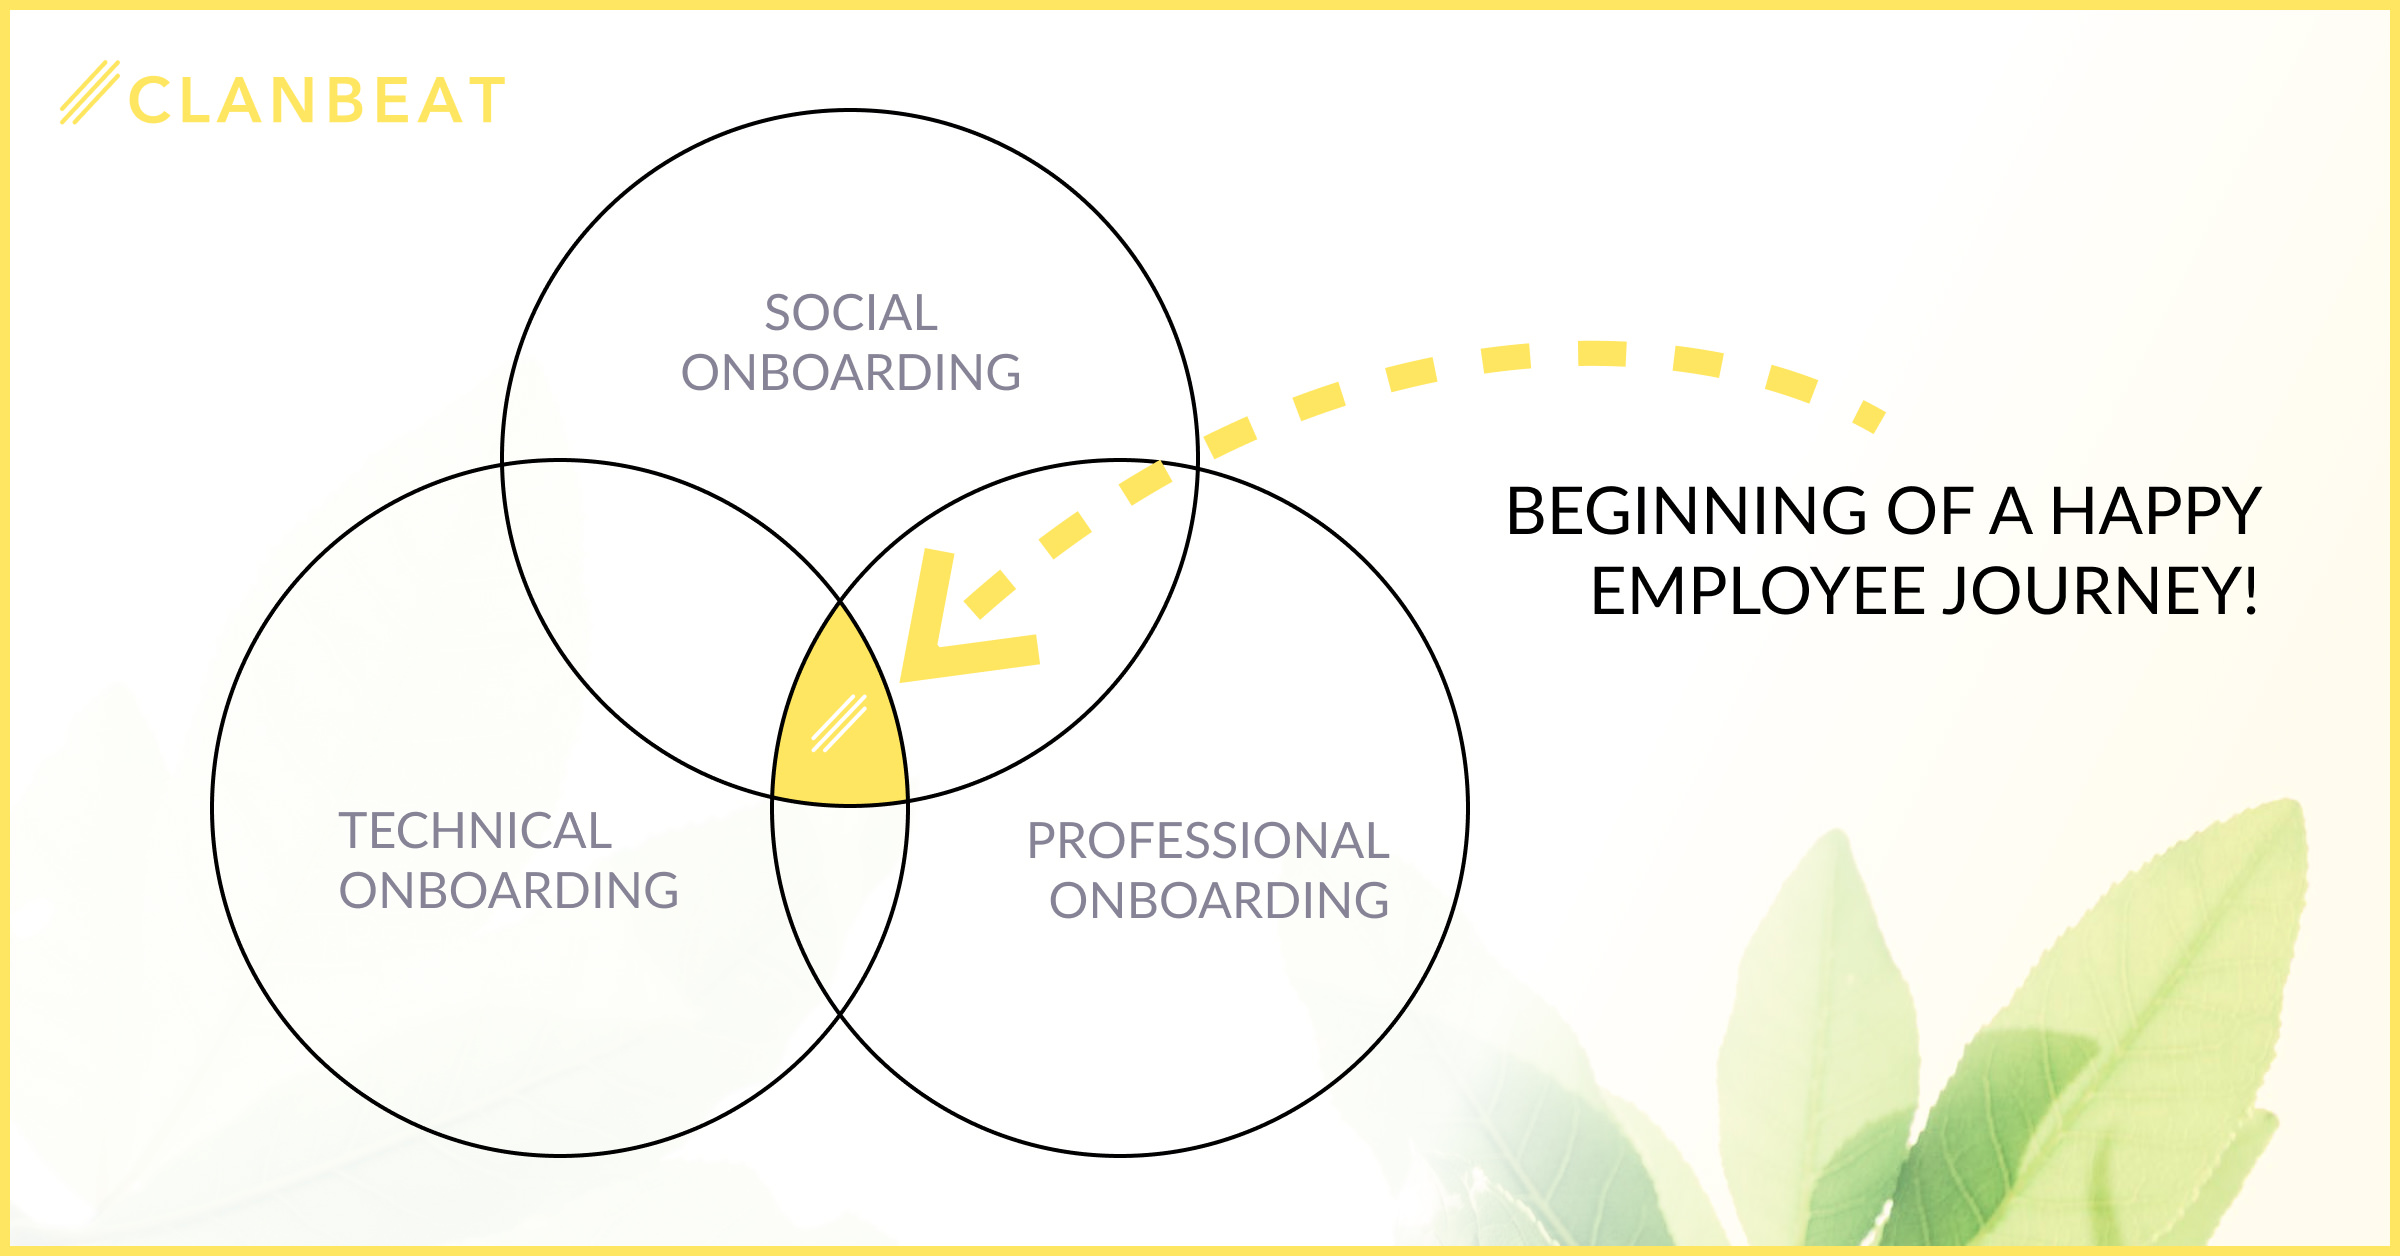
Preparation is crucial to make onboarding an experience instead of a goal to get the new employee to deliver results fast. Moreover, if the aim is to have employees who are inspired by the work environment and willing to make a change, you should dedicate enough time and effort to their onboarding.
Managing onboarding
Since the onboarding process is experienced from the very first encounters with you and should thus be led early on, the onboarding in Clanbeat is also linked to inviting new members and only users with „Manager“ or “Administrator“ rights can manage onboarding. You have the rights by default if you launched the Virtual Teachers’ Lounge for your organization.
Still, it is up to you to decide whether to invite new members to your school’s Virtual Teachers’ Lounge with the onboarding task list or without. Colleagues who do not need onboarding can be added to Clanbeat without using the onboarding feature – please see here for a quick overview.
How to create a new onboarding flow?
The starting point
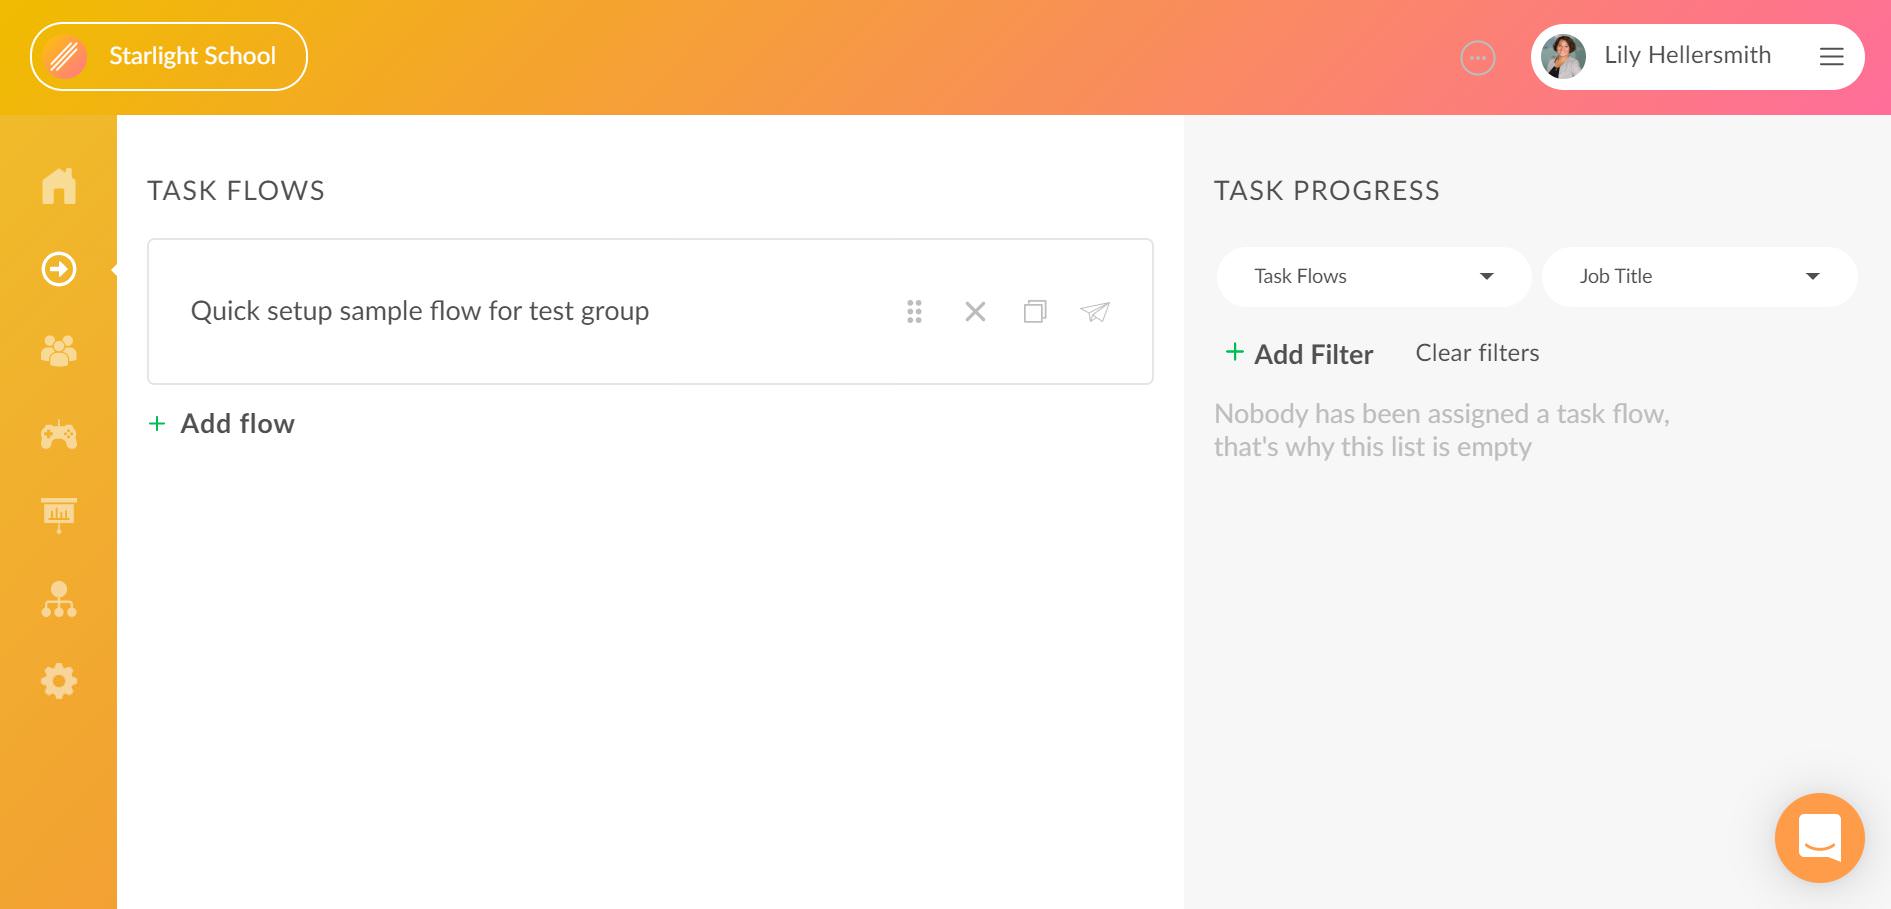
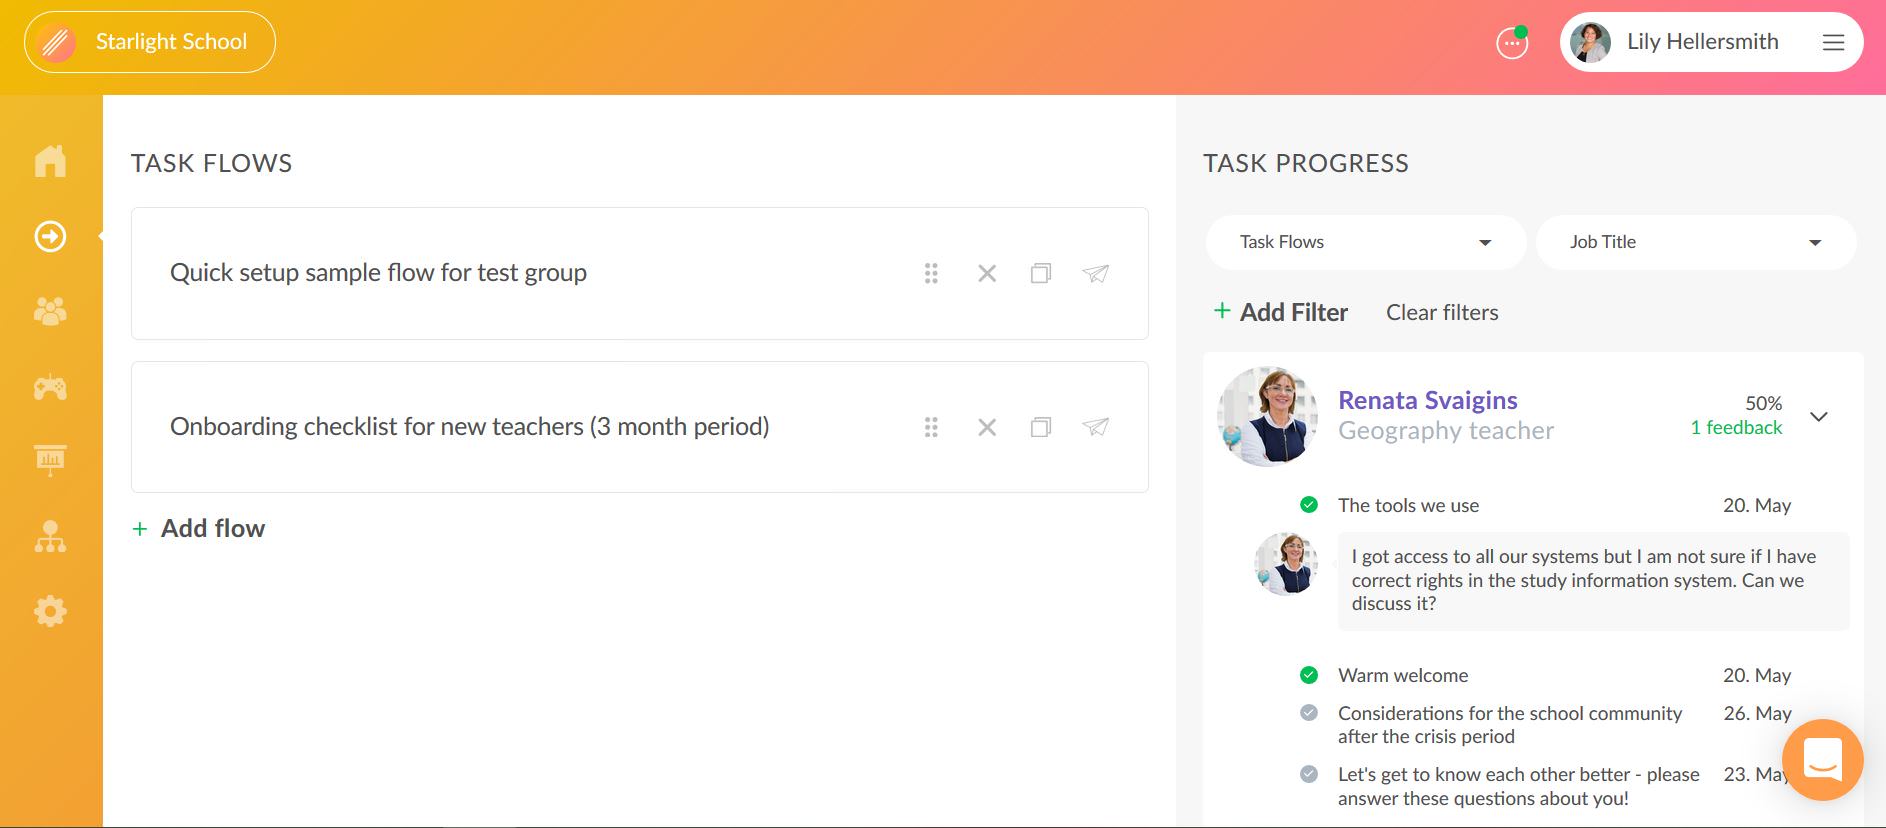
To create a new onboarding flow for your new colleagues, go to the left sidebar and click on “Task flows”. Here you will already see one sample flow “Quick setup sample flow for test group”. All future onboarding lists will be displayed on this page and you can create several of them to match the specific role of the new employee and your agenda.
The sample flow
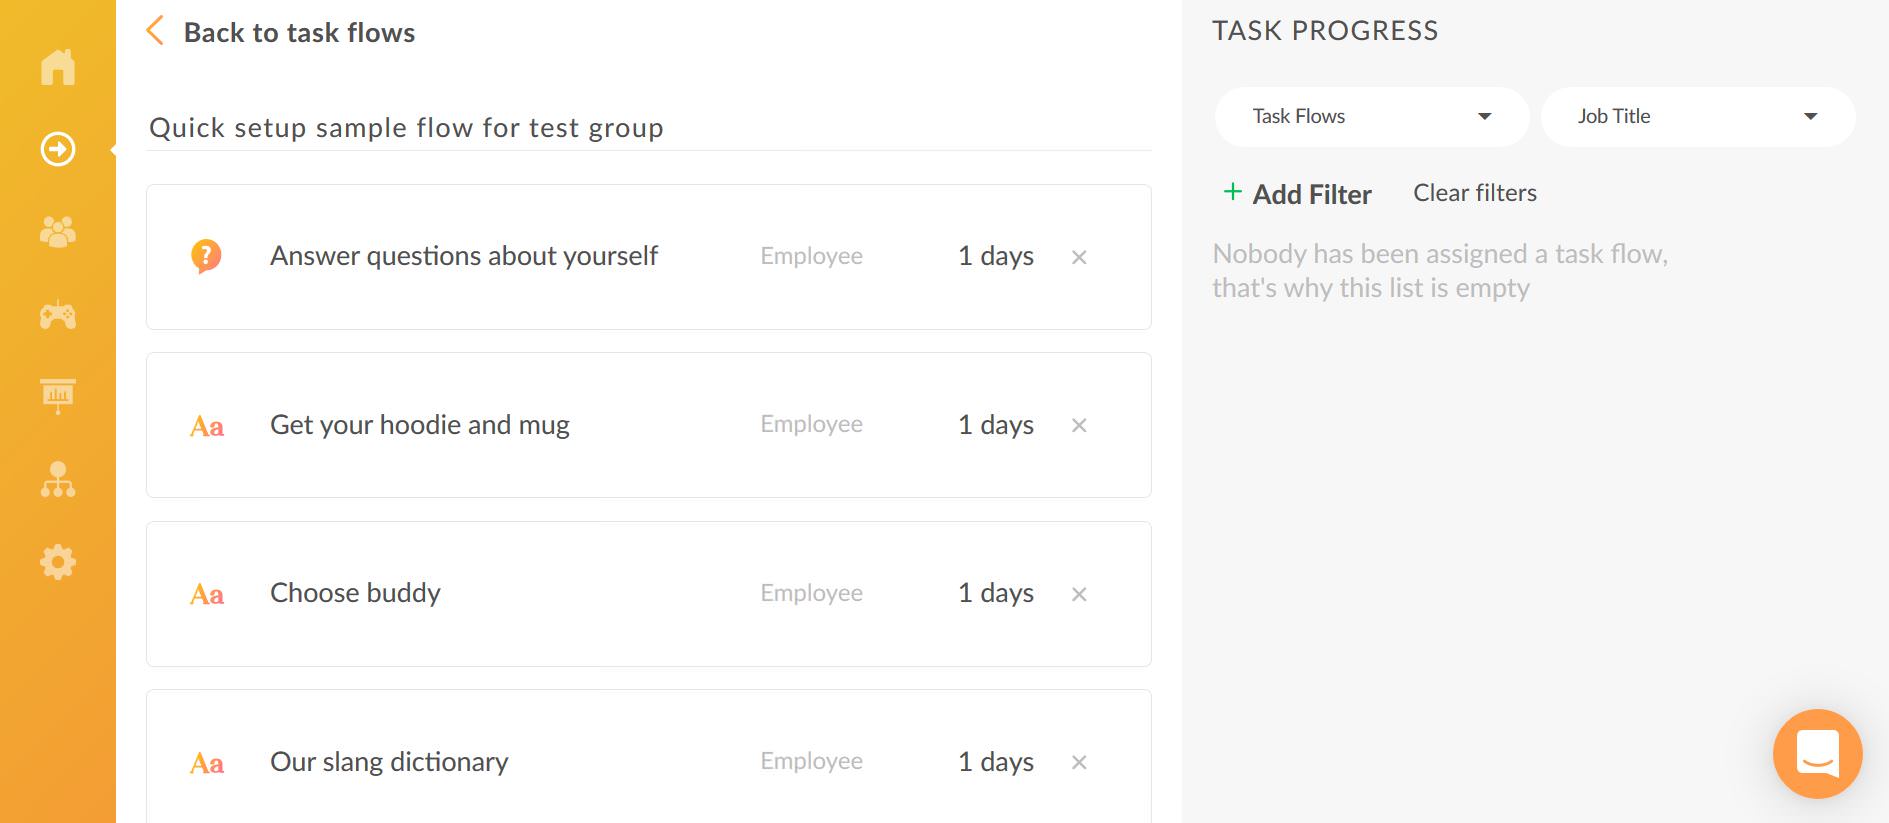
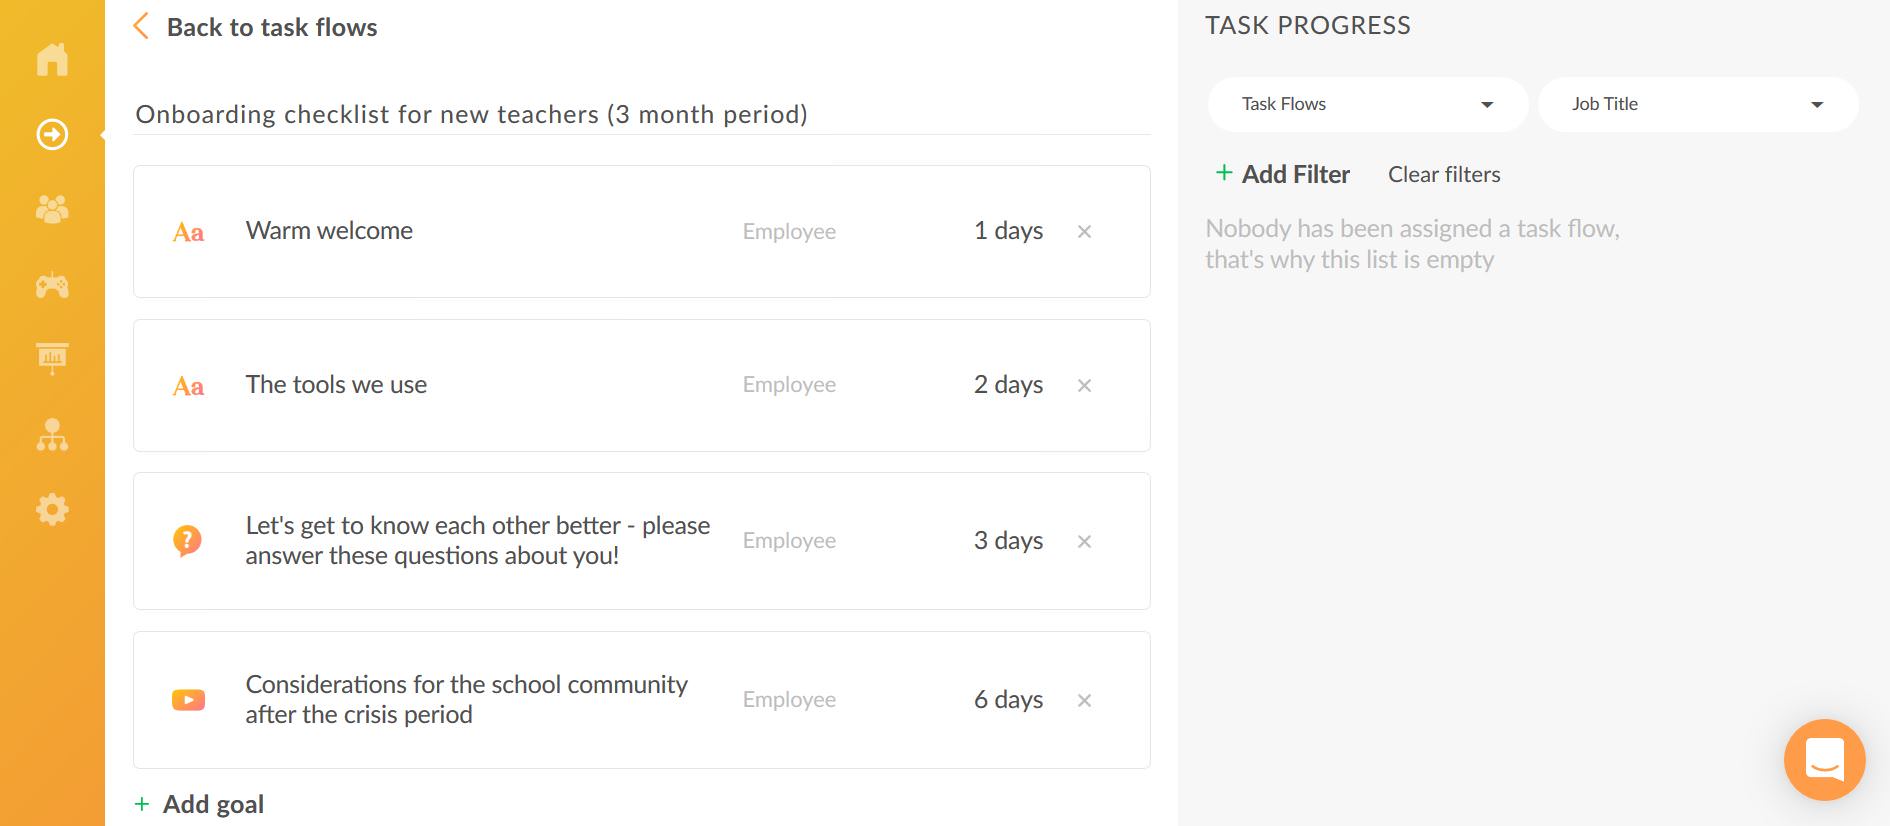
If you click on the sample flow, it helps you understand how one onboarding flow can look like and it can be used with a few current users to test the onboarding process you are about to create for new colleagues. The flow consists of a list of steps which will be displayed as goals with a due date to the new colleague. You can click on each checklist item to see and edit the content and set the due date.
Creating a new flow
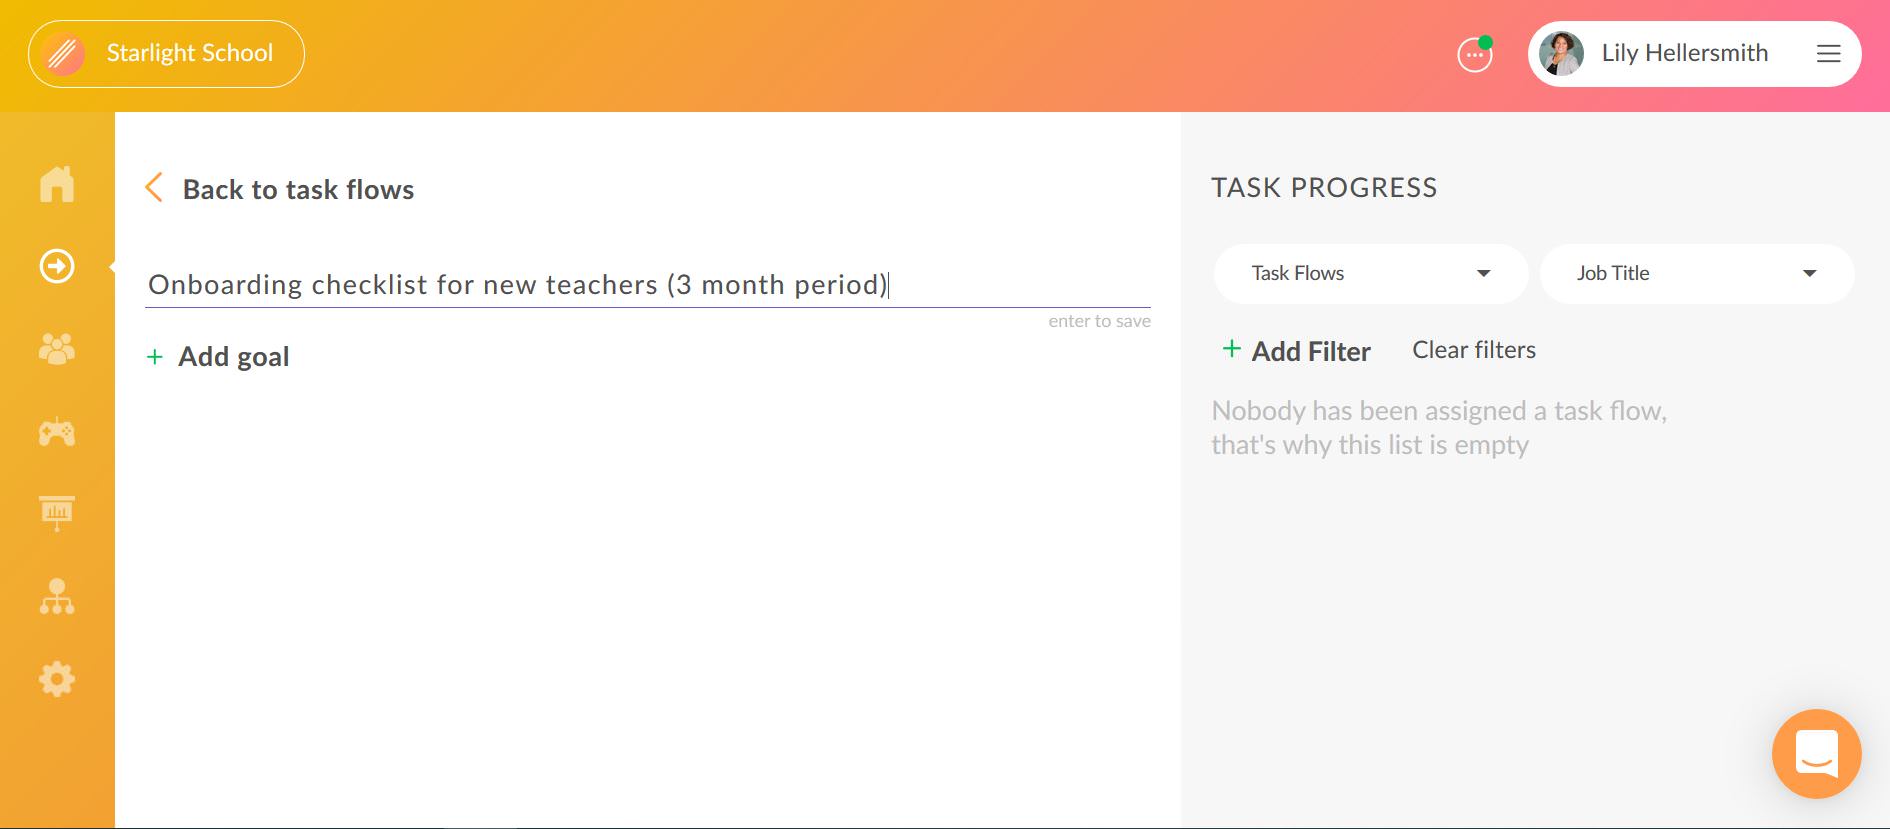
To create a new onboarding flow (task list), click on “Add flow”, choose a relevant name for the task list and press enter. The name is only visible to you and later helps to identify the task list, should you have different target groups for the onboarding flows.
The format of the checklist item
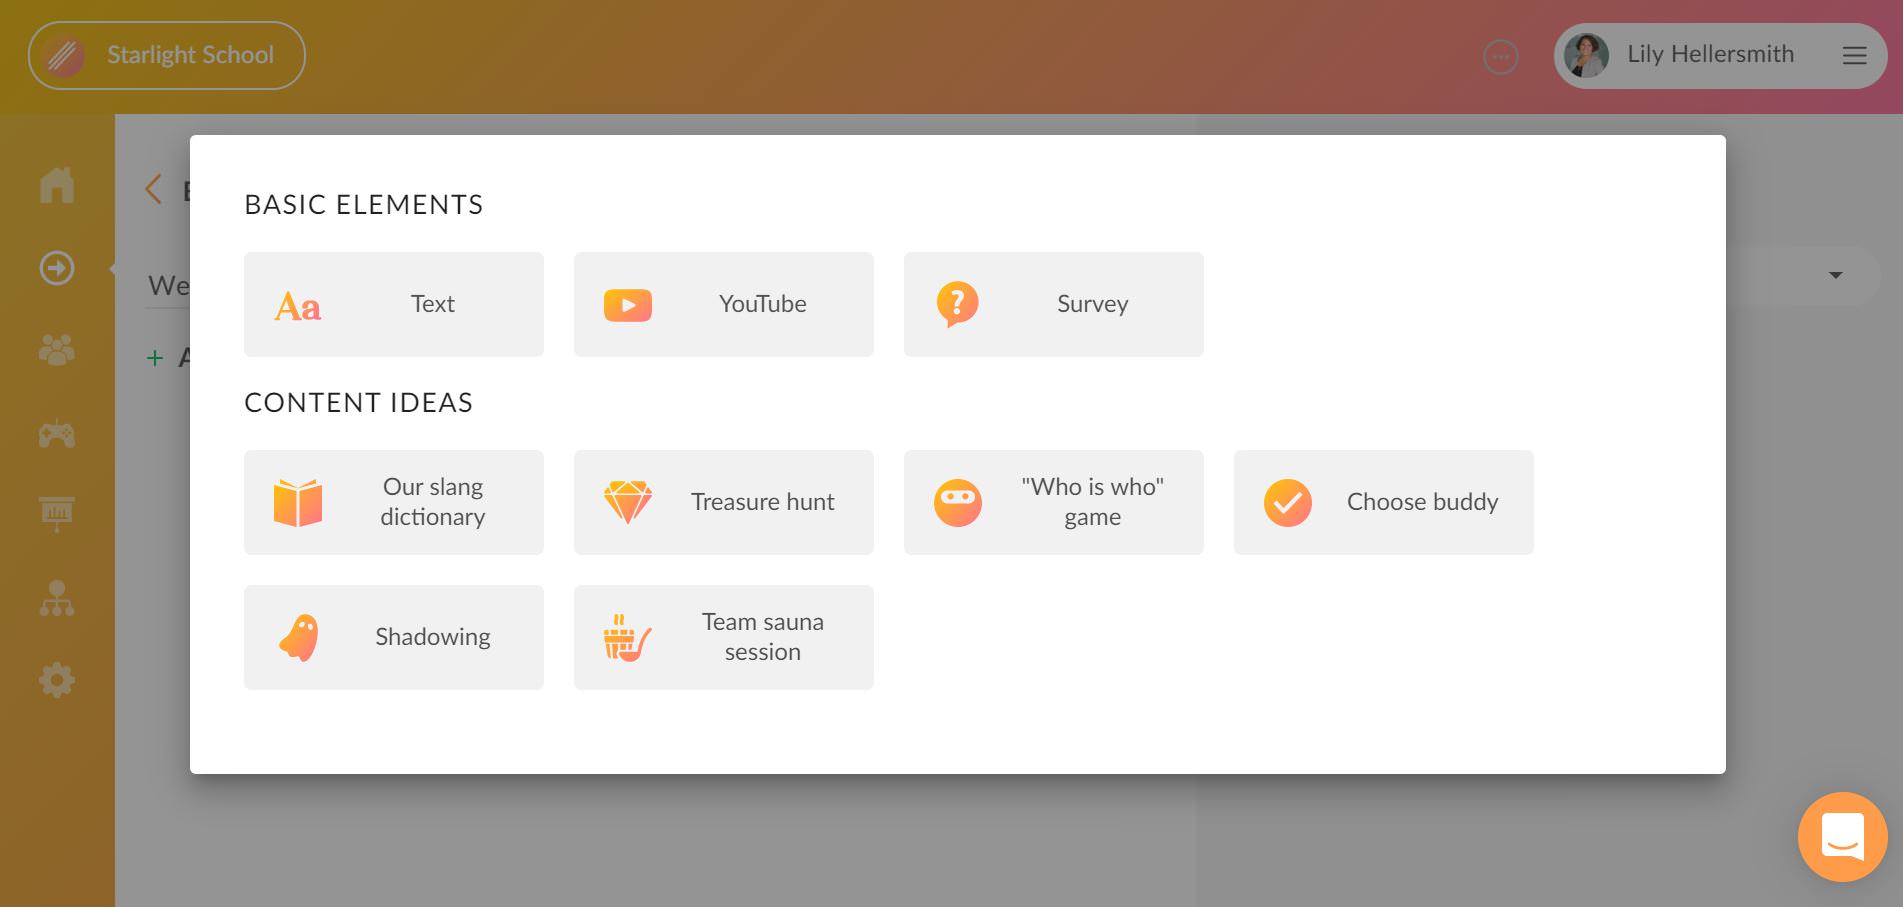
By clicking “Add goal” you are prompted to create a new checklist item to your onboarding flow and can choose between 3 basic elements. Your choice between the “Text”, “Youtube” and “Survey” will determine the format of your checklist item. The most common way to present a checklist item to your colleague is using the text format. If you have prepared any video materials and would like to visualise some items, you can choose the “Youtube” element. When you would like to encourage team bonding or simply help the new colleague to get to know the coworkers, you can create questions with the “Survey” element.
Creating content
When you have chosen the preferred format for the new task, you can start creating content. The content fields depend on the chosen element:
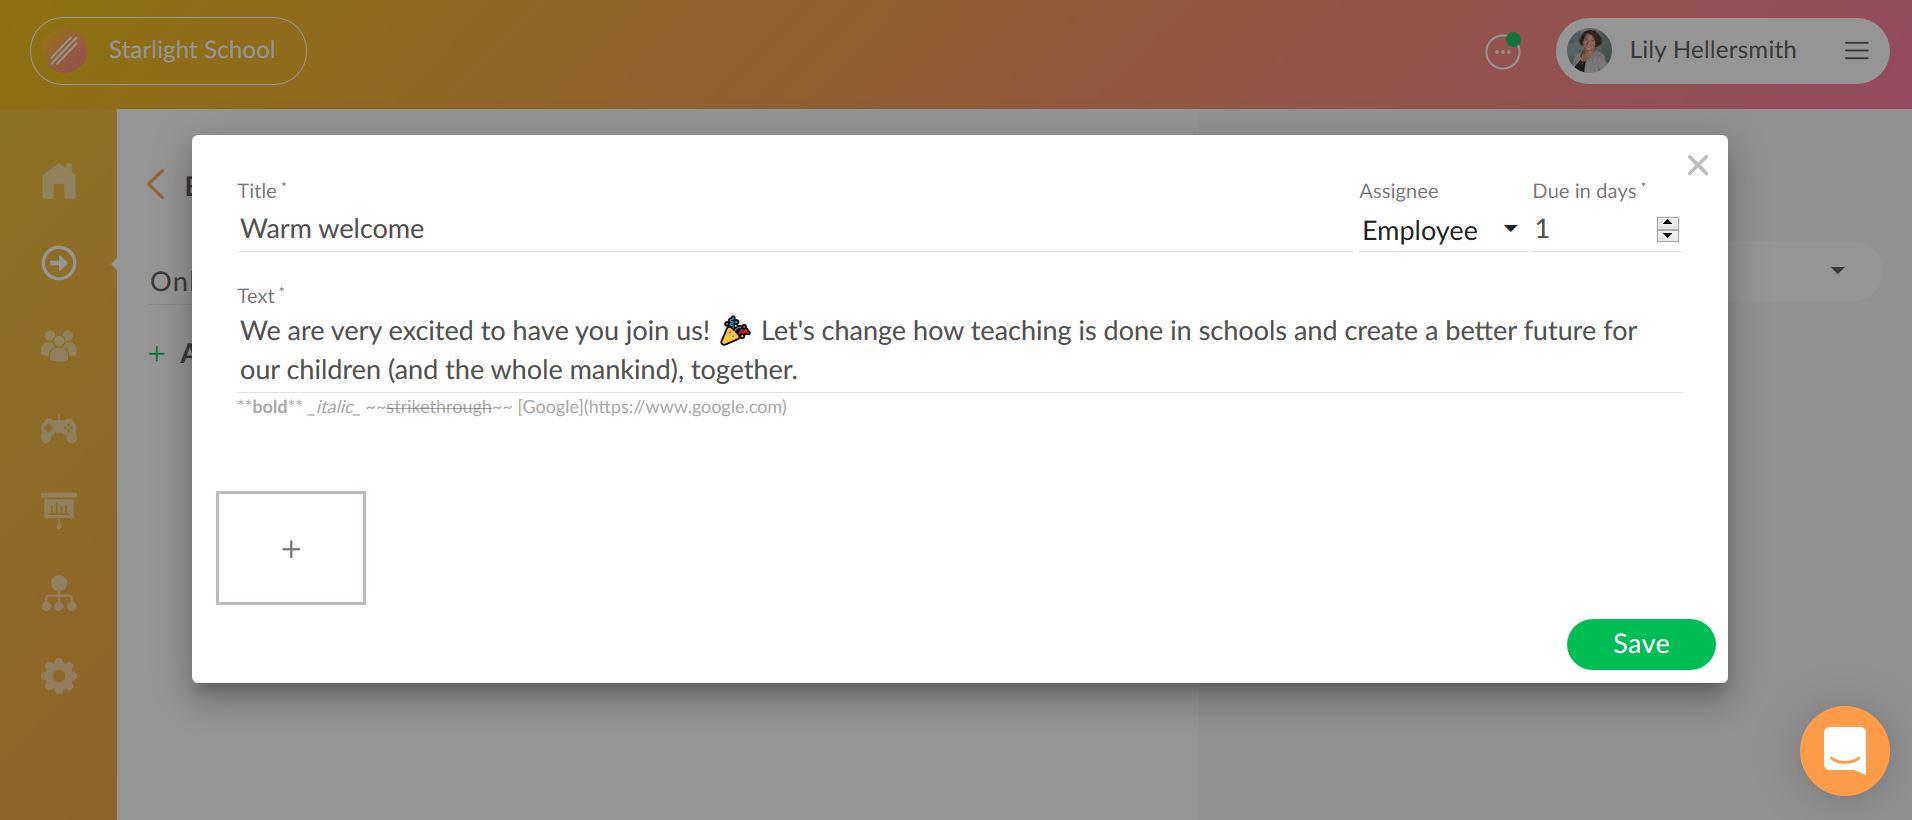
Text element: add a title and an explanation to your task. You can use the prompted symbols to change the text format. There is an option on the left corner to attach photos as well. All this information will be visible to the task recipient.
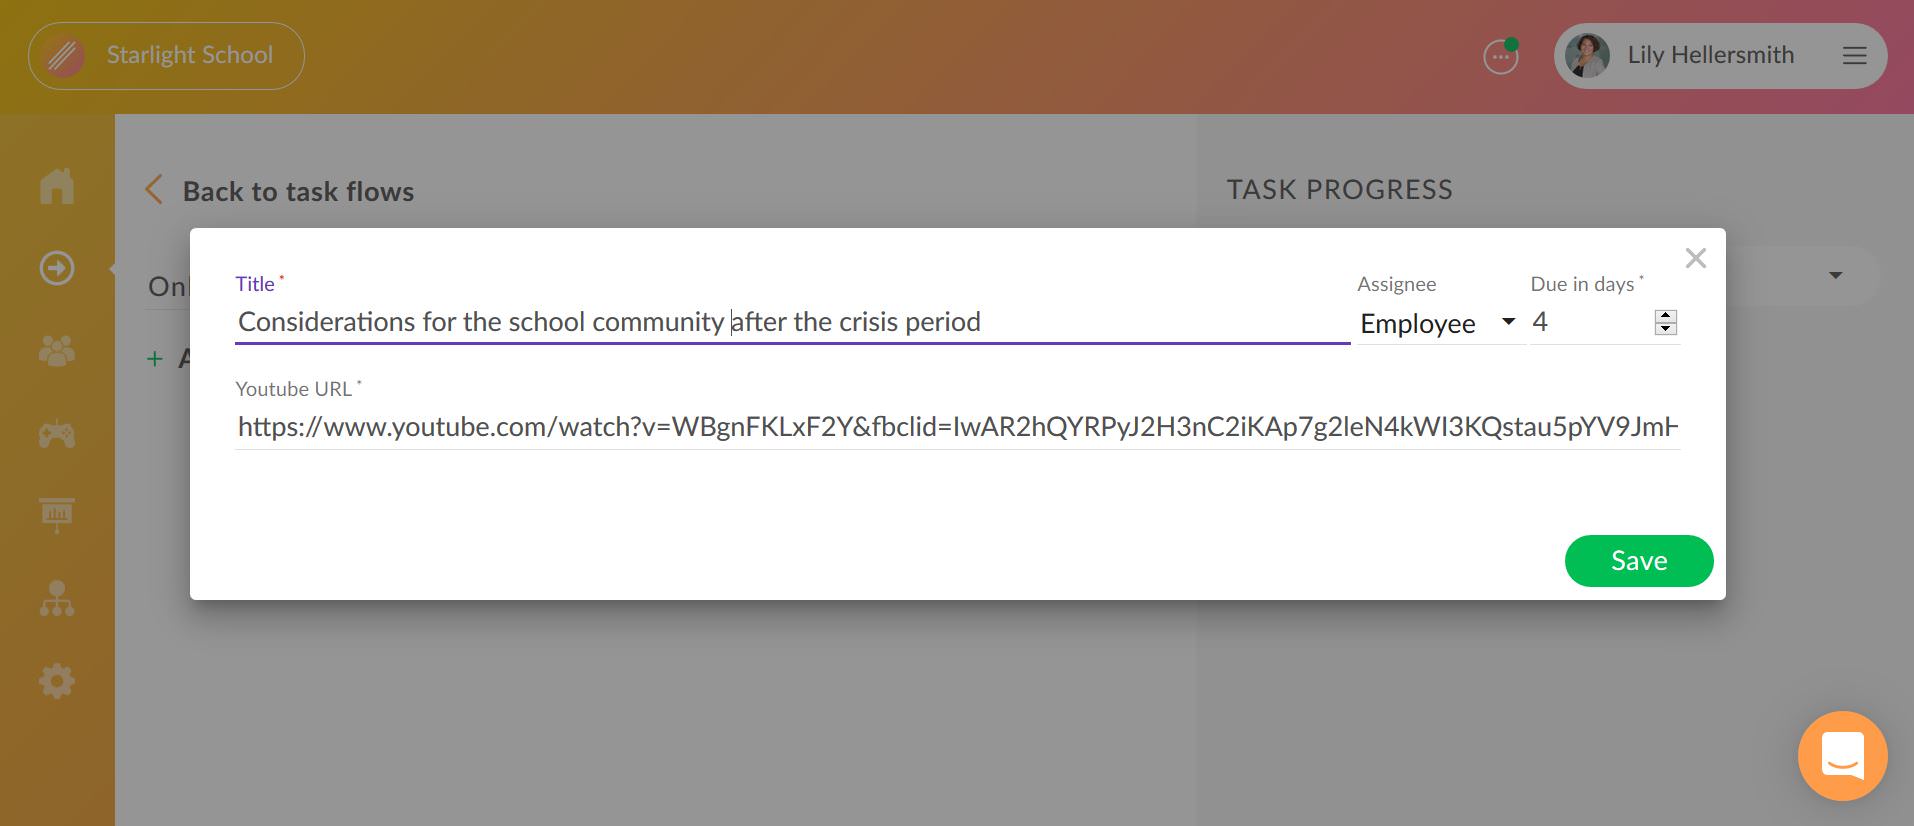
Video element: add a title (or use the field to explain the video) and a link to the video on Youtube that you would like the colleague to see.
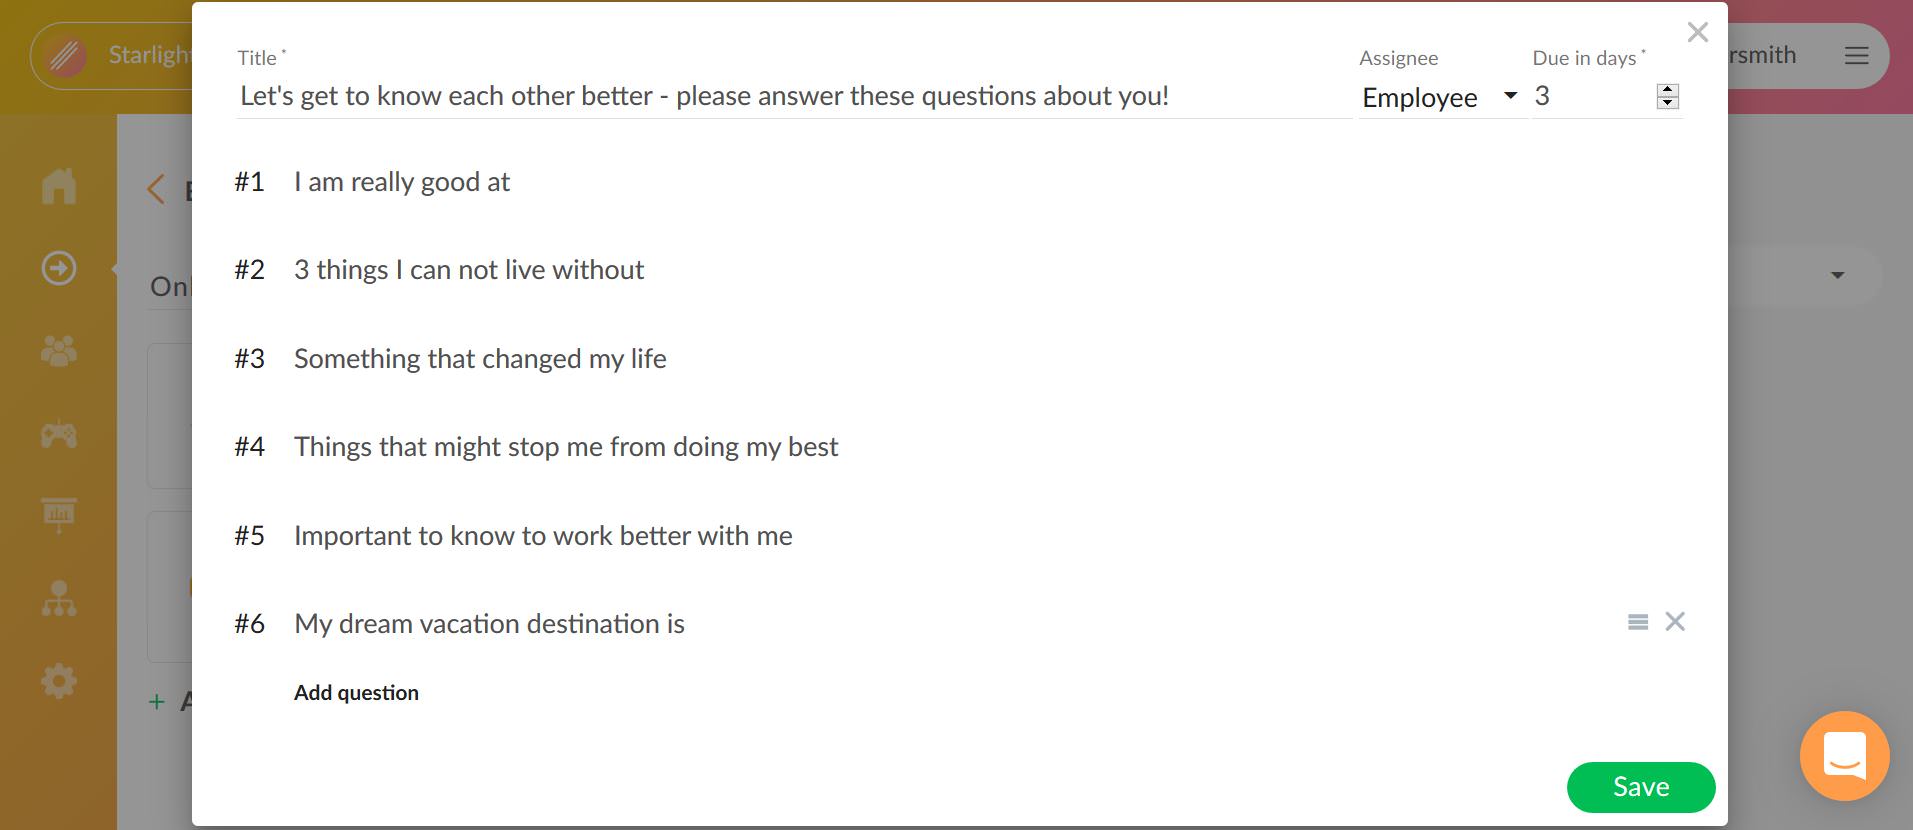
Survey element: add a title and create questions that you would like your colleague to answer. You can use the pre-installed sample questions and/or add new ones, remove questions with the “X” icon and reorder the list with the “ladder” icon. Bits and pieces like this are great conversation starters for your colleagues and they introduce the team members as unique individuals behind the job title.
Content ideas
When you need inspiration to create content for your overall task list, you can check if there is anything that proves useful to you under the “Content Ideas” selection. There are some game ideas and other examples how you could make the onboarding process joyful and impactful. You can create as many to-dos and fun tasks as you prefer to your onboarding flow but you should still be mindful of the timeline and your colleague’s development.
Selecting the recipient and due date
Each of the three task elements provides an option to select the goal recipient under “Assignee” and set a due time for the goal under “Due in days”.
Goals for the new employee
In most cases, the new onboarding goal is targeted directly to the new employee, so you should choose “Employee” and schedule the goal for them according to your preferences. The goal will be created by clicking on “Save”.
Goals for the team leader
When you wish to delegate an onboarding-related goal to your current team member so they would support the new colleague in the onboarding process, you should choose “Team lead” and schedule the goal for the team lead according to your preferences. The goal will be created by clicking on “Save”. Only the team leader will receive this goal from the overall onboarding flow.
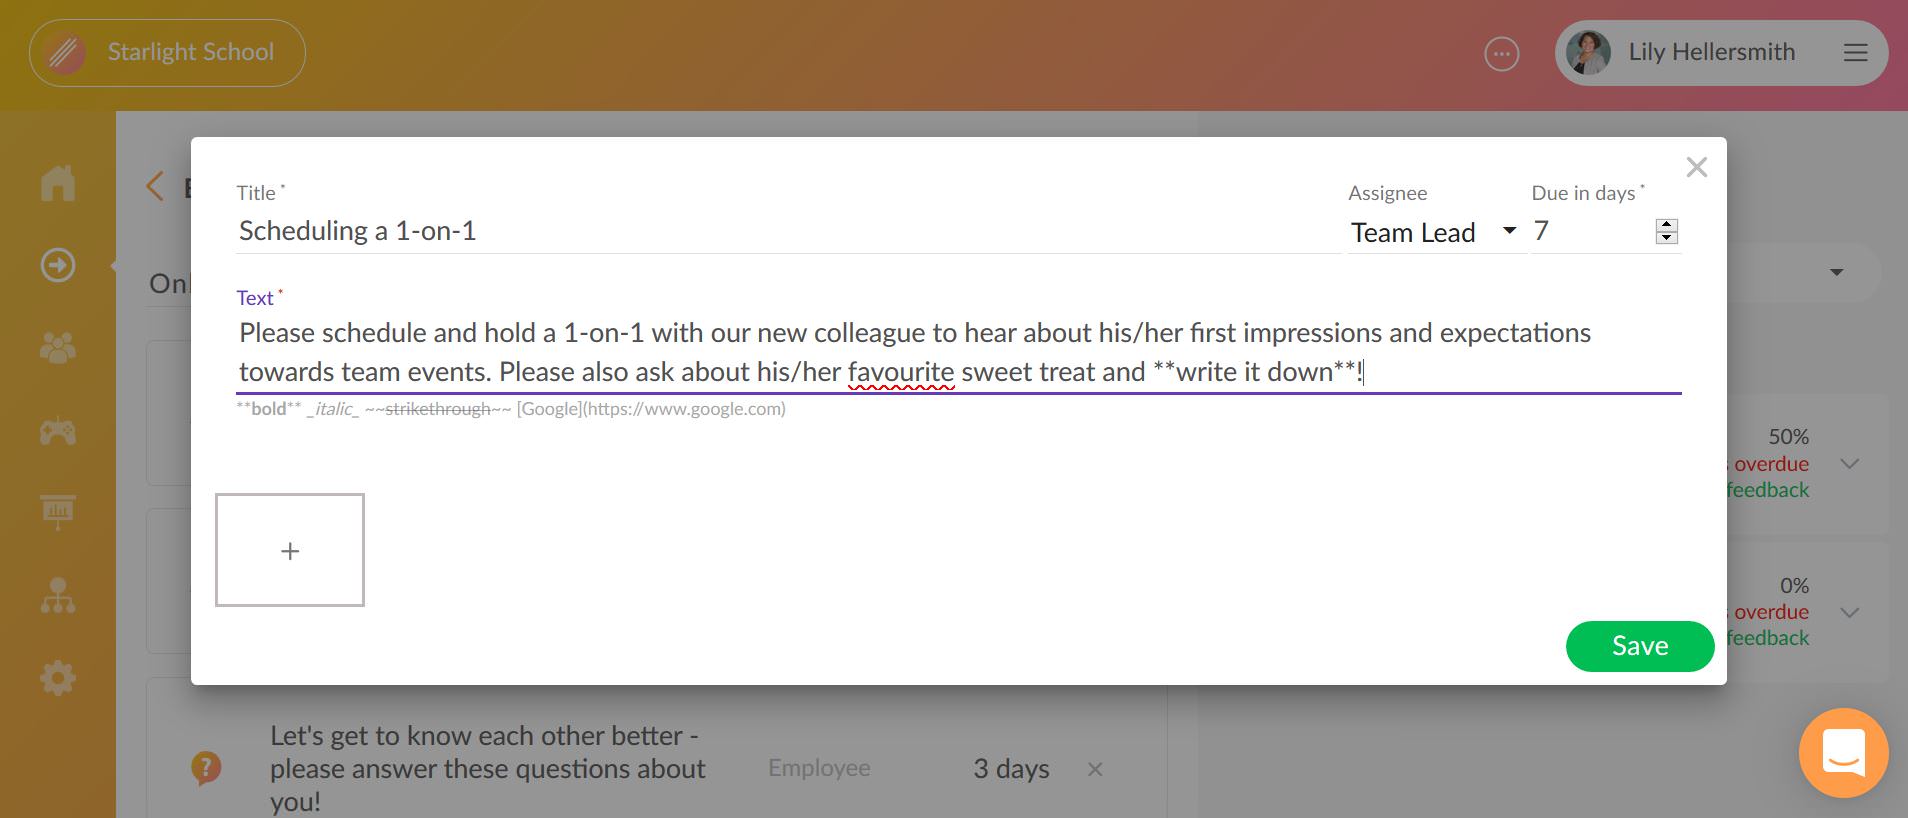
Once you have created all the relevant task list items, you can go over the list and make sure you have added the appropriate content, recipient role and due date for each goal.
How to invite colleagues with an onboarding flow?
Easy Input
Your profile will be created based on information collected through welcome goals. Having a profile helps to increase team familiarity and find colleagues who can offer help in a specific field, when it is needed.
Add a new person
When you have prepared your onboarding flow, you are ready to invite your new colleague with the onboarding checklist. For that, go to the “Team” section from the left sidebar and click on the green “Invite members” button.
Add the contact details
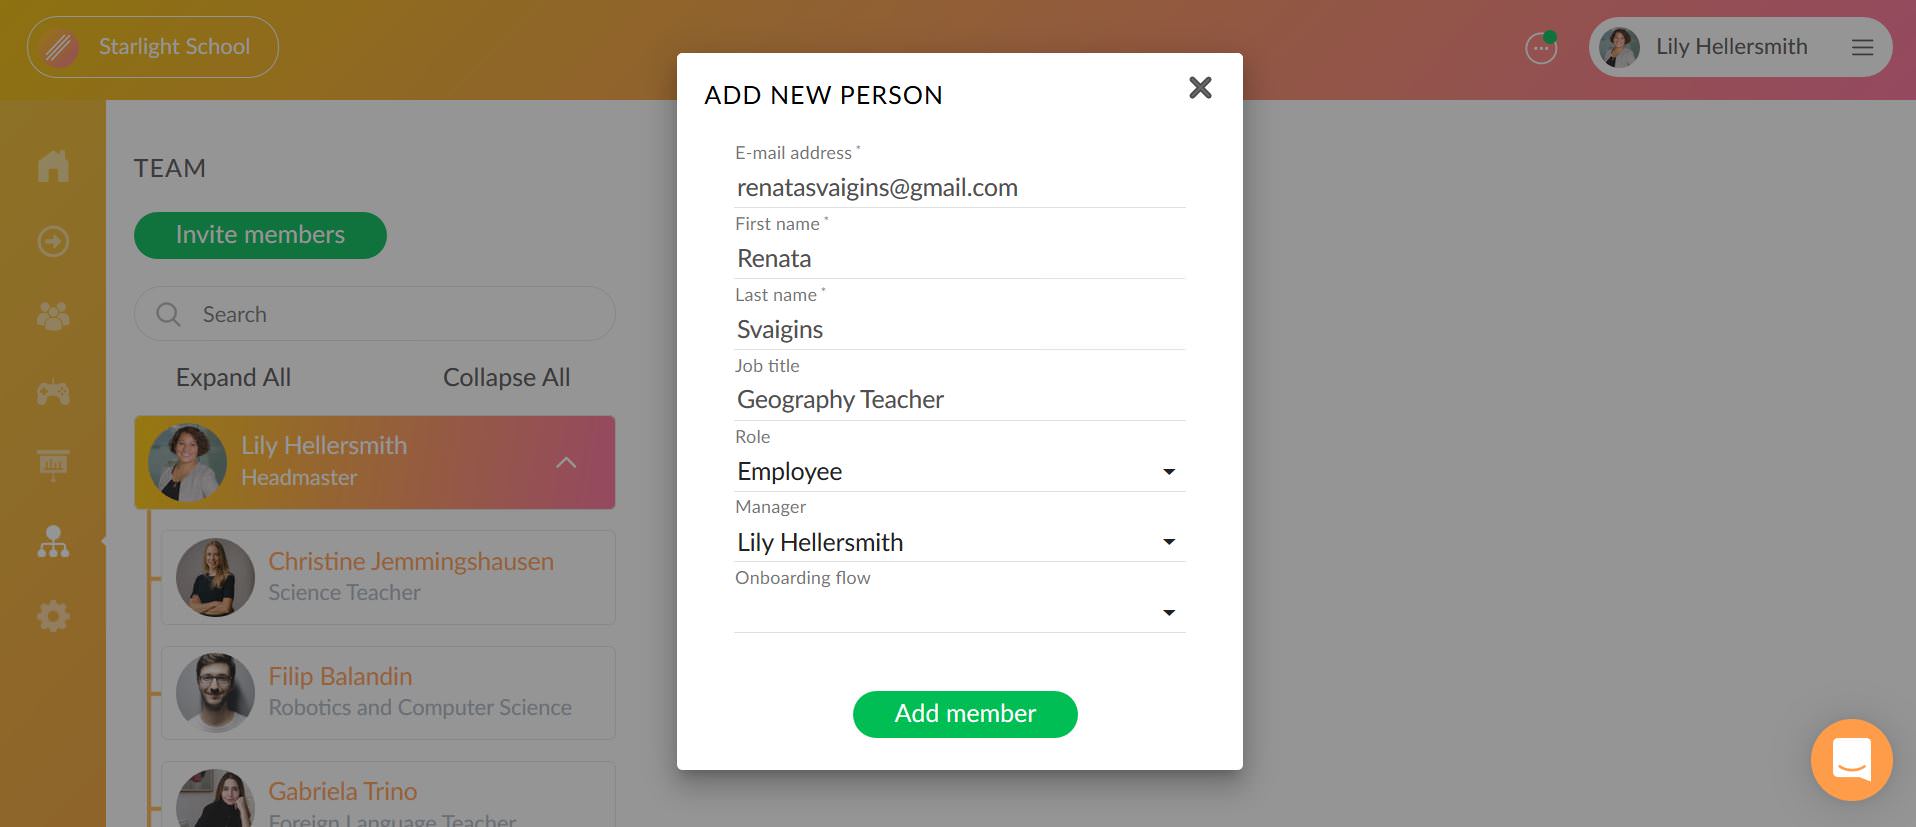
Add the contact details of your new colleague, the job title, and assign an appropriate role for the new colleague. Choose “Employee” if it is a teacher and give “Manager” rights if the new team member should be allowed to send tasks to others and track their task progress. The role can be updated at any point.
Add the senior manager
If your onboarding task list includes any goals for the new colleague’s team leader, it is important to choose the right person under the “Manager” option. This way the goals targeted to the team leader will reach the correct recipient. Please make sure you have upgraded the team leader’s role to “Manager” under team settings before you send out the task list.
Choose the correct onboarding flow
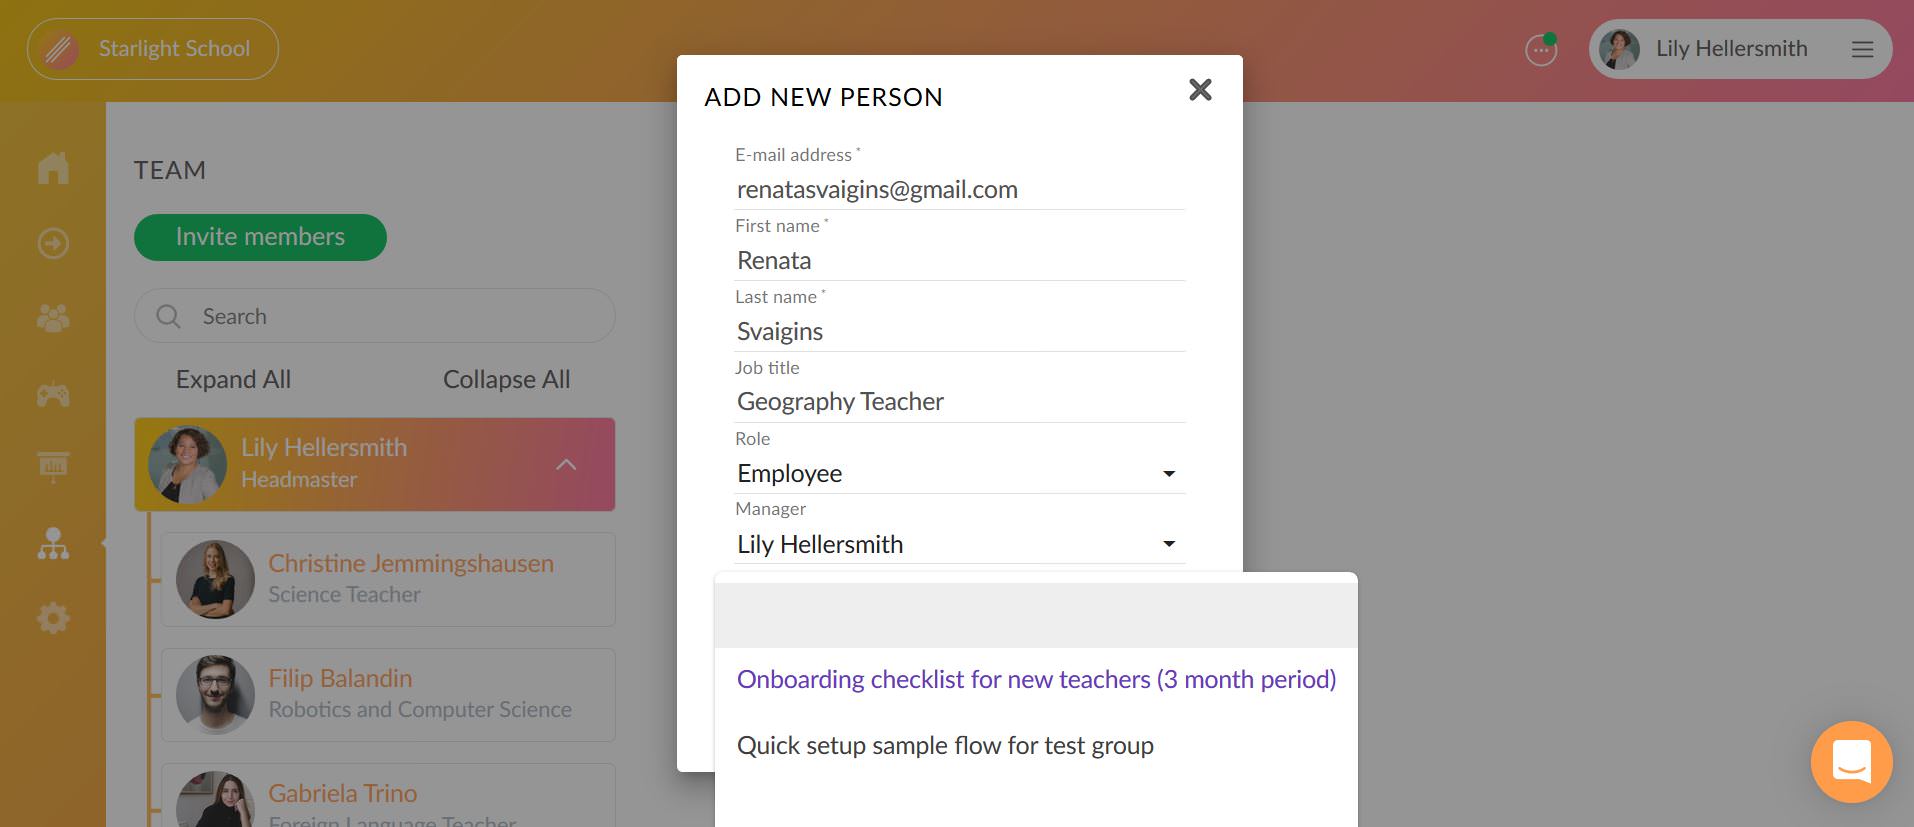
As the most important step, make sure to click on the “Onboarding flow” tab and choose the correct onboarding flow that you have created. When you have selected the right flow, click on “Add member” to send out the invitation and welcome the new colleague with the task list that helps them to settle in.
The invited colleague will receive an invitation to their email and should click on the provided link to join the platform. You will receive an email notification once the colleague has joined the platform.
See the onboarding progress
When you have sent out the invitation with the onboarding flow, you will get an overview of your colleague’s progress with the given checklist. To track the progress, go to “Task flows” from the left sidebar and view the “Task progress“ section. You will see if the colleague has gone through the necessary steps and keeps the schedule and if they have left any feedback to you regarding the checklist items that they received.
After the checklist
It is worth remembering that onboarding doesn’t end when the checklist gets ticked off – it ends when the employee feels onboarded. So be there for the new colleague also after the first few weeks or months have passed and show genuine care for the individual. Only then will the colleague contribute to the team’s efforts with their full potential. We suggest adding a task for yourself also to check in with the newly onboarded colleague at 1, 4 and 6 month milestones. Let Clanbeat remind you about that.


